Sharing your work with others
One of the main features in Overleaf is to allow teams to edit documents simultaneously and interact in real time. This article explains how to add collaborators to your project, and also how to share a project publicly.
Adding collaborators to your project
After opening your project, move your cursor to the upper right corner of the page and click the Share icon . |
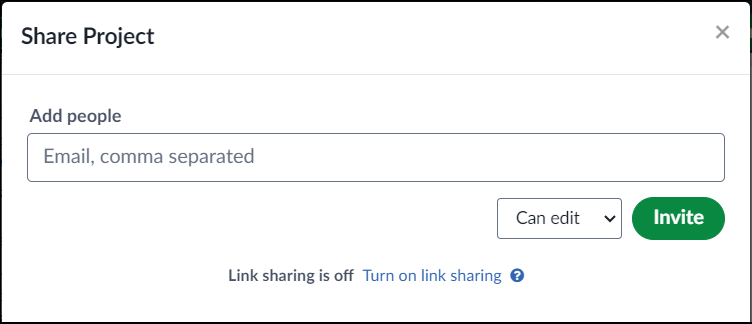
Enter your collaborator's email address in the input box that pops up. If your collaborator already has an account on Overleaf, this should be the email address they use to login to Overleaf. Right below the text box, you will see a drop-down menu where you can set the permissions the new collaborator will have: Can Edit or Read Only. Then click the button Share. |
In the example, the owner's email is team+templates@sharelatex.com and is sharing the project "SharingSample" with a collaborator whose email is a.collaborator@email.com with Can Edit privileges. You can add several collaborators to your project (this depends on your Overleaf subscription plan). |
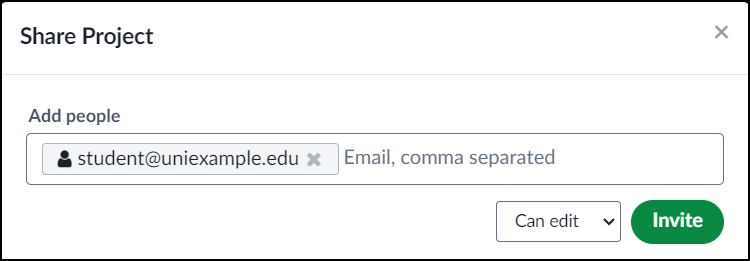
After adding a new collaborator, you will see the corresponding email in the list. You can remove a collaborator from this project by clicking the x. |
Once you've added a collaborator to your project, said project will show up in your collaborator's Projects page, and the name of the owner is also displayed. Notice that the projects you own have "You" in the OWNER column. |
Now your collaborator can start editing the document. Here, two different users are editing the same document. We the owner's screen, and the owner's cursor is shown in black. The orange icon with letter A (the first letter of the username a.collaborator) shows that the collaborator is also editing. Their cursor is shown in orange |
Overleaf provides the following features:
|
Premium features such as Track Changes are available to all collaborators in a project, once they are enabled on the owner's account. Your colleagues don't need their own subscriptions to take advantage of the full power of Overleaf when they join your projects.
Link sharing
There's also the possibility of sharing your project via a direct URL:
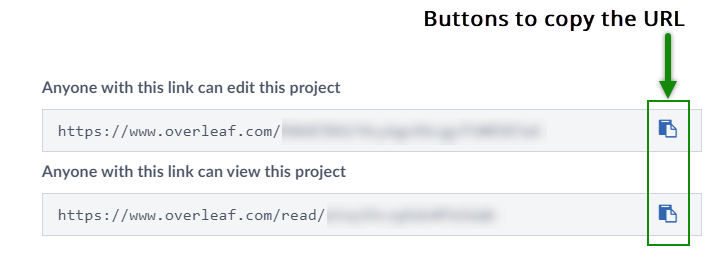
Sharing by link can be enabled in the Share dialogue. In the dialogue box that will appear, click Turn on link sharing, in the upper right corner. Two links will be shown, one which will give access to the project to edit, and another which will give access to read the project only. |
For each link-shared document, Overleaf creates a unique token used only for the link to that document. It is almost impossible to guess the token, and hence the link to your document is known only to you. Please note however that if you publish the link to your document on a website or somewhere public, anybody can use the link and the website where your link is posted might even be included in search engines. By default, new projects created in Overleaf v2 have link-sharing turned off, and cannot be accessed by URL unless it is turned on via the Share menu.
Once link-sharing is turned on, anyone can read a project with a read-only link, and anyone with an Overleaf account can join a project with a can-edit link. Link sharing can be turned off at any point by clicking Turn off link sharing. The links will no longer provide access to the project, and anyone who joined the project by a sharing link will no longer be able to view or edit it.
Quick Guides
- Adding collaborators to your project. Within your project, click the Share icon . In the dialogue box that appears, enter your collaborator's email, and in the drop-down menu right below the email input box select the privileges your collaborator will have. Finally click Share.
- Sharing a project via link. Within your project, click the Share icon , then click Turn on link sharing. Use the link with the appropriate privileges to share your project publicly or locally. Please note that if you publish the link to your document on a website or somewhere public, anybody can use the link and the website where your link is posted might even be included in search engines. By default, new projects created in Overleaf v2 have link-sharing turned off, and cannot be accessed by URL unless it is turned on via the Share menu.
Overleaf guides
- Creating a document in Overleaf
- Uploading a project
- Copying a project
- Creating a project from a template
- Including images in Overleaf
- Exporting your work from Overleaf
- Working offline in Overleaf
- Using Track Changes in Overleaf
- Using bibliographies in Overleaf
- Sharing your work with others
- Debugging Compilation timeout errors
- How-to guides
LaTeX Basics
- Creating your first LaTeX document
- Choosing a LaTeX Compiler
- Paragraphs and new lines
- Bold, italics and underlining
- Lists
- Errors
Mathematics
- Mathematical expressions
- Subscripts and superscripts
- Brackets and Parentheses
- Fractions and Binomials
- Aligning Equations
- Operators
- Spacing in math mode
- Integrals, sums and limits
- Display style in math mode
- List of Greek letters and math symbols
- Mathematical fonts
Figures and tables
- Inserting Images
- Tables
- Positioning Images and Tables
- Lists of Tables and Figures
- Drawing Diagrams Directly in LaTeX
- TikZ package
References and Citations
- Bibliography management in LaTeX
- Bibliography management with biblatex
- Biblatex bibliography styles
- Biblatex citation styles
- Bibliography management with natbib
- Natbib bibliography styles
- Natbib citation styles
- Bibliography management with bibtex
- Bibtex bibliography styles
Languages
- Multilingual typesetting on Overleaf using polyglossia and fontspec
- International language support
- Quotations and quotation marks
- Arabic
- Chinese
- French
- German
- Greek
- Italian
- Japanese
- Korean
- Portuguese
- Russian
- Spanish
Document structure
- Sections and chapters
- Table of contents
- Cross referencing sections and equations
- Indices
- Glossaries
- Nomenclatures
- Management in a large project
- Multi-file LaTeX projects
- Hyperlinks
Formatting
- Lengths in LaTeX
- Headers and footers
- Page numbering
- Paragraph formatting
- Line breaks and blank spaces
- Text alignment
- Page size and margins
- Single sided and double sided documents
- Multiple columns
- Counters
- Code listing
- Code Highlighting with minted
- Using colours in LaTeX
- Footnotes
- Margin notes
Fonts
Presentations
Commands
Field specific
- Theorems and proofs
- Chemistry formulae
- Feynman diagrams
- Molecular orbital diagrams
- Chess notation
- Knitting patterns
- CircuiTikz package
- Pgfplots package
- Typing exams in LaTeX
- Knitr
- Attribute Value Matrices
Class files
- Understanding packages and class files
- List of packages and class files
- Writing your own package
- Writing your own class
- Tips